For once I have a recipe that will not cause a casual visitor here to wonder why this place is called chinese grandma.
I may have four kids, but I’m no grandma; and I’m the kind of American-born Chinese that took Spanish in school and is rendered apologetically mute when a real Chinese grandma comes up asking for directions.
It wasn’t until college that I learned about the simplistic, often snarky, spectrum that some use to measure degrees of Chinese-ness. Recent immigrants are FOBs, fresh off the boat, while ABCs, American-born Chinese, are also known as bananas (yellow on the outside, white on the inside).
I find the whole idea of classifying people silly, but after I stumbled across that old, hilarious blog, Stuff White People Like, I had to admit to being nailed. Sushi? Yup. Farmer’s markets? Totally. Apple Computer products? Tea? Grammar? Of course. TED Talks? Who doesn’t?
So I’m kind of white-bred. But I know good Chinese food. Both my parents are legit from China. I can’t make a lot of the incredible food my mom makes – who in modern life has time for that? – but I can tell you how to make the easy stuff.
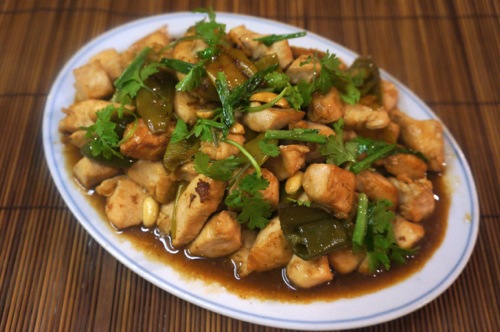
Kung pao chicken is surprisingly easy to make at home, and you can make this spicy, tangy, peanutty deliciousness with hardly a trip to the grocery store. The one critical ingredient you might not have is whole dried chili pepper, and in a pinch you can substitute a good shake of crushed red pepper.
The big deal in this recipe is a cooking technique that will transform any stir fry you ever make – a technique that will make your chicken as tender and juicy as if it had come from a Chinese restaurant.
Here’s the secret: First you need to blanch your diced chicken in hot oil (preferably) or boiling water, sort of using the hot liquid to sear the surface of the meat. Without batter, the meat absorbs very little oil, and the quick bath gives it deletable flavor and texture.
Then you drain the meat well and stir fry it, adding sauce to coat. Compared to my cheater chicken and green beans stir-fry, you’ll definitely taste the difference. It’s an extra step, but it’s a quick one, and it doesn’t require the vat of oil you’re imagining.
The technique of pre-cooking meat in hot oil or water is called velveting (and you didn’t know velvet could be a verb!). Depending on the recipe, sometimes a bit of water is first added for the chicken to absorb, sometimes wine, and in my mom’s recipe here, it’s soy sauce. The universal marinade ingredients are cornstarch (or tapioca starch) and egg white, both of which form an invisible coating layer.
You may be tempted to jump to the water method – less messy, less hazardous, surely healthier – but I have to tell you that my mom, a real Chinese grandma, would never consider it. She would tell you from decades of experience that without batter, the meat absorbs very little oil – the quick sear in hot oil simply locks in flavor and juiciness in a way that water cannot.
So I road tested both approaches, and of course she is absolutely right. The oil-blanching method is an easy winner on both flavor and texture. The water method gives a soft texture to the meat – better than simply stir-frying the raw meat – but the taste of the chicken alone is bland. With the oil method, the flavor of the juicy chicken is outstanding even without the finishing sauce.
I include the water-blanching method here only for its single advantage: with water blanching, you can pause your preparation after that step, refrigerate the pre-cooked meat, and finish with the very quick coating with sauce just before serving. Oil-blanched chicken won’t keep as well for later.
But I’ll show you here so you can see the difference yourself.
Kung pao chicken (in Mandarin Chinese it’s pronounced “gong bao”), a dish from the Sichuan province of southwestern China, is traditionally made with Sichuan peppercorns. For fear of a citrus-damaging bacteria, the United States banned Sichuan peppercorns from 1968 to 2006, which limited its availability in U.S. markets. In any case, both of my mom’s standby cookbooks use dried chili peppers and no Sichuan peppercorns, which is also how the dish is usually made in American restaurants.
In traditional Chinese cooking, meat and vegetables are typically cooked separately – you won’t find beef and broccoli in China, or chicken and string beans. And aside from maybe onions, you would not normally find vegetables in kung pao chicken. But my mom likes to add a bit, usually bell pepper, for visual interest.
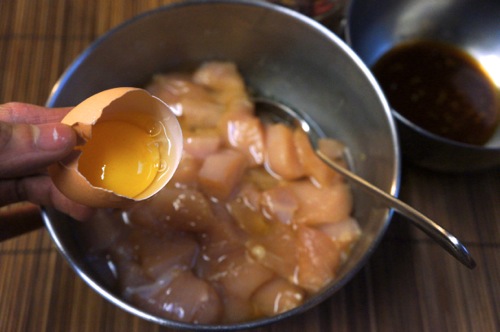
An egg white in the marinade is not absolutely necessary with the oil-blanching method, but you do need it for water blanching.
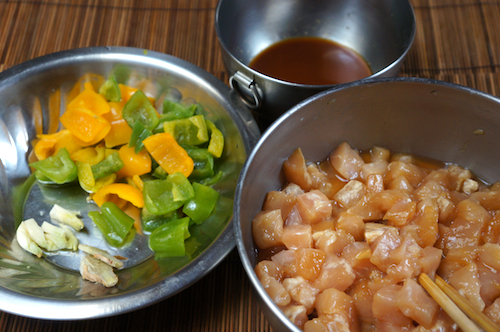
Mix up the simple sauce – soy sauce, vinegar, sugar, a bit of cornstarch. Prep vegetables, if using, and have your garlic and ginger ready.
My mom rarely uses her wok, which takes up too much storage space for her compact kitchen. A few years ago she got a small electric fryer called the Fry Daddy, which is basically a heated crock about the size of a coffee can, and with it she fries food outside like other people grill.
But her old-school method, which I show here, is a simple skillet. Cast iron is awesome at retaining heat, but of course you can use whatever you have.
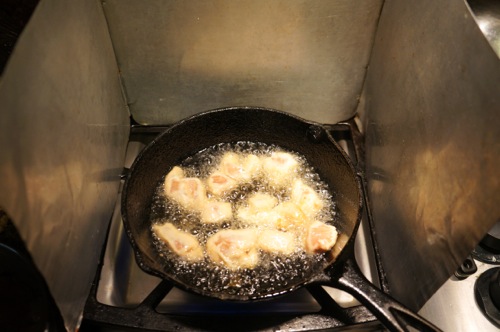
Like a wok, which can hold a small pool of oil at the bottom, my mom’s small 8″ cast iron skillet has the advantage of using less oil than a larger pan. Because the uncoated chicken does not absorb much oil, a half-inch should be sufficient.
One bubbling batch at a time, it doesn’t take long to give the chicken a quick dip.
Stuff Chinese people like: a foldable splatter guard for moments like these.
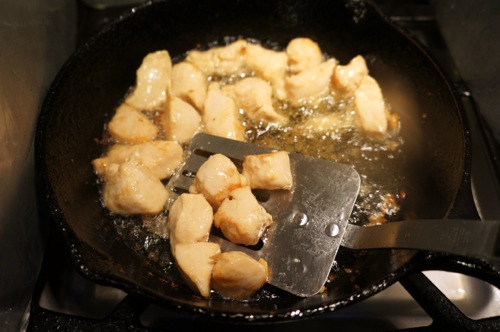
Remove almost immediately, before the chicken cooks through.
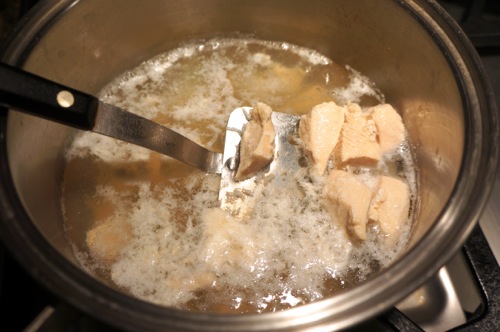
With the water method, the chicken is blanched in water with a spoonful of oil. Give it just a quick dip – you don’t want to cook the chicken, just zap the surface.
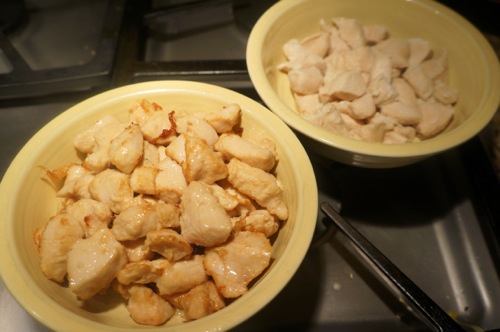
The water-blanched chicken looks pasty next to its oil-bathed brethren.
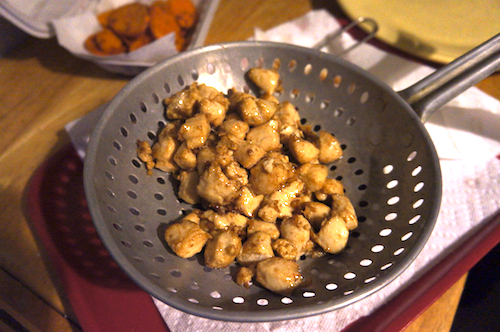
It’s important to drain the chicken well, not just for excess oil or water but also because it will collect juices as it rests. My mom has a big old strainer for this (more stuff Chinese people like).
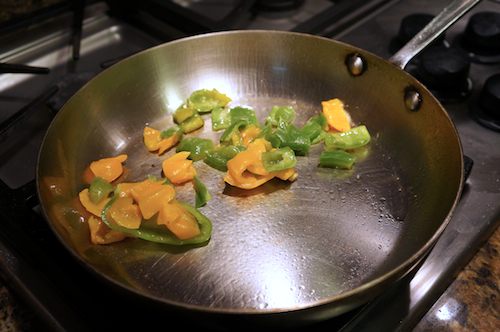
A very quick stir fry of the bell peppers. As with the chicken, this is just a quick pre-cook, in preparation for the big finale.
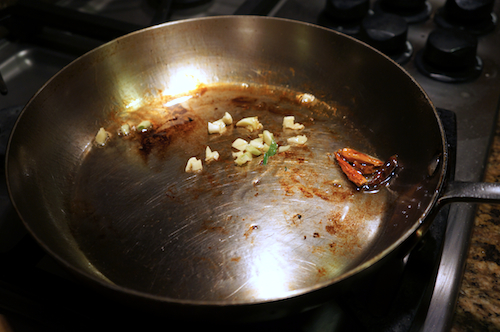
Then out with bell peppers and in with dried chili peppers, garlic and ginger. This is when things start smelling good. And from here the dish comes to a fast finish.
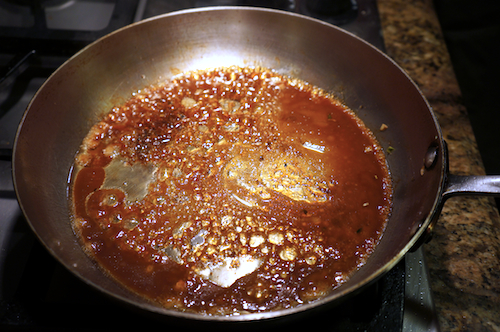
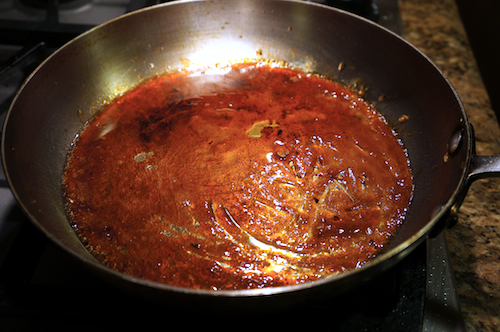
Normally people return the meat to the pan and then add sauce. But my mom cooks her sauce first.
It gets thick and glossy almost immediately.
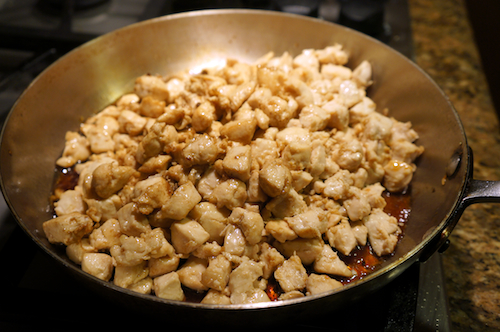
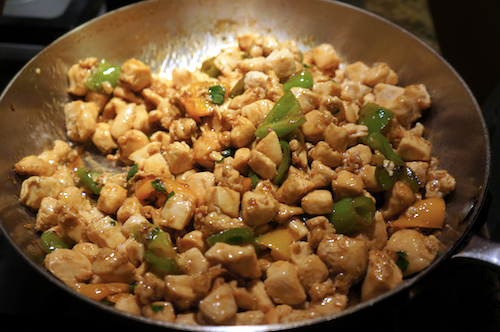
Add back chicken and bell peppers.
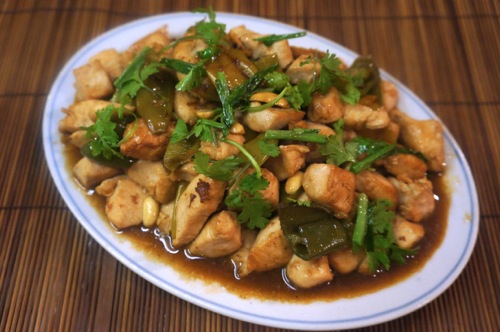
Peanuts last, because after a while the sauce makes them soggy. You can also add scallions here, and a bit of sesame oil to finish.
Serve hot, with rice.
And there it is – real Chinese grandma food. If a banana can make it, you can too.
* * *
Postscript (7 March 2014)…In going back through posts, I realize I posted kung pao shrimp earlier…and it was only last year! Yikes, maybe I am a grandma before my time. I forgot to put that one in my recipe list, so it kind of faded away in my memory.
But now I remember – I posted the shrimp version because you don’t need the blanching step with shrimp. But now you have the secret step for kick-butt chicken stir-fries, kung pao or otherwise. Enjoy!
Kung Pao (Gong Bao) Chicken
With its simple ingredients, kung pao chicken is surprisingly easy to make at home. The secret to making chicken as juicy and soft as in Chinese restaurant stir fries is one extra step: blanching the chicken pieces in hot oil or water first.
Marinating ingredients
- 2 pounds boneless, skinless chicken
- 2 tablespoons soy sauce (my mom and I use Kikkoman)
- 1 tablespoon cornstarch
- 1 egg white (see note below)
Sauce ingredients
- 3 tablespoons soy sauce
- 1 1/2 tablespoons white vinegar
- 1 tablespoon sugar (white or brown)
- 1 teaspoon cornstarch (or tapioca starch)
Other ingredients
- Cooking oil
- 1 bell pepper, diced (optional)
- 4 dried whole chili peppers, broken in half (more or less if you like; this should give a mild kick)
- 2 cloves garlic, minced
- 2 slices ginger, minced
- 2 green onions, sliced (optional)
- 1 teaspoon sesame oil
- 2/3 cup roasted peanuts
Preparation
- Cut chicken against the grain (across the lines, not along them) into 1/2-inch strips, then cut each strip into bite-sized pieces. The exact size of the pieces is not as important as the uniformity – ideally pieces should have about the same cook time.
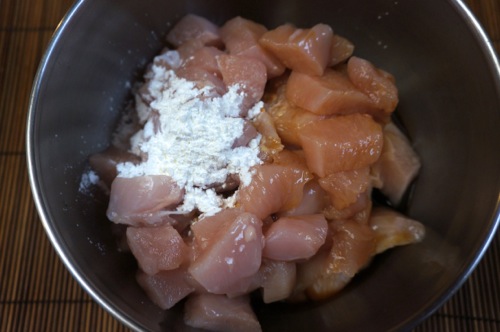
- Place chicken pieces in a medium bowl and add soy sauce, cornstarch and egg white (I also recommend a few shakes of salt if you are using the water method). Stir well to coat. Set aside (if you have time, let marinate in refrigerator for a couple of hours or up to a day before).
- Prepare sauce: In a small bowl, add soy sauce, vinegar, sugar and cornstarch. Mix and set aside.
- Blanching chicken in batches – oil method (preferred): Heat 1/2 inch of oil in a wok or small skillet and heat until very hot and shimmering. Use a spoon to lower chicken to oil carefully, one scoop at a time. Stir to separate chicken pieces. Add enough so that chicken fits into a comfortable but not crowded single layer. Turn pieces and remove quickly with a slotted spoon or spatula after the chicken turns white. Chicken will not completely cooked through. Drain well in a strainer or on paper towels while you cook the next batch.
- Blanching chicken in batches – water method: Boil a couple of inches of water in a saucepan. Add a tablespoon of cooking oil. Use a spoon to lower chicken into boiling water carefully, one scoop at a time. Don’t overcrowd the pot; you want the water to stay close to boiling. Stir to separate chicken pieces. Turn pieces and remove quickly with a slotted spoon or spatula after the chicken turns white. Chicken will not be completely cooked through. Drain well in a strainer or on paper towels while you cook the next batch.
- When finished with oil blanching, remove excess oil from pan (you can strain and re-use it later if you like), leaving a tablespoon or two. If you used the water method, you’ll need to heat 2 tablespoons oil in a wok or skillet over medium-high heat. Add bell peppers, if using, and cook briefly to soften. Remove bell peppers.
- Add dried chili peppers, garlic and ginger, turning until fragrant. Give prepared sauce a stir before adding to the pan. Sauce will immediately turn glossy and thicken. Add chicken and bell peppers back to pan (careful not to include any liquid that may have collected during the chicken’s post-blanching rest). Stir to coat. Add green onions, if using, and peanuts. Drizzle sesame oil over and mix. Remove to platter and serve hot.
Serves 6.
Notes
- Chicken is much more flavorful with the quick dip in oil instead of water.
- The water method is preferred only if you have to prepare ahead of time – you can blanch the chicken in water, drain well and refrigerate until you are ready to finish the dish.
- If you blanch the chicken in oil, you can skip the egg white without any issues. But you do need the egg for the water method.
- If using raw peanuts, you can give the peanuts a quick fry before starting the chicken. Just add peanuts to oil first, cook briefly until golden, and use a strainer to remove. Drain well in a strainer or on paper towels.
- In a pinch, you can substitute a shake of crushed red pepper for the whole dried chili peppers.
- Don’t sweat it if you don’t have fresh ginger – it’s also fine without.
- If you don’t have white vinegar, apple cider vinegar or unseasoned rice vinegar would also work. If you use seasoned rice vinegar, you can reduce the sugar in the marinade to maybe 2 teaspoons.
- As is traditional, this recipe doesn’t make a ton of sauce, just enough to coat the chicken pieces. If you want extra, or if you are adding some extra vegetables, you can certainly double the sauce.
Here’s the link to a printable version.



Hi CG. I like the foldable splatter guard! Being a bit of a hot oil wimp, the hot water velveting appeals to me, and I wonder if the chicken could be marinated after velveting to infuse more flavour?
Hi this is akshay me and my mom made this recipe and i was AWESOME
hi akshay – how fantastic to hear from you! you and your mom are awesome for trying the recipe, and i am very excited you liked it!! we look forward to seeing you this summer. 🙂
I just made this recipe and loved it!!!You have a lovely website going on there,great stories,great recipes and detailed step-by-step instructions!!Very generous and democratic!!Wish you all the best!!
hi priscila – so glad you enjoyed it! and thank you so much for the kind words. =)
Hi. When blanching the chicken with oil do you let the chicken cool prior to the final cook.
Regards
hi scott – no, you can finish with the final cook right away, and ideally you would. though if you wanted to prep the dish ahead and then finish it later, you could refrigerate the chicken after the quick fry in oil, and then do the final step right before you want to eat. thanks for the question, i hope that helps!