If you don’t make yogurt at home, you may wonder why anyone does. Sure it’s cheaper, but yogurt is not expensive and you’re probably not eating enough to care. For me it’s the taste (pure and natural), the health benefits (DIY probiotics) and the digestibility (low/no lactose). You can’t buy the equivalent at the store at any price.
People thought it was a little odd when I started making yogurt a decade ago, but now there’s more awareness about gut health and its impact on all kinds of chronic conditions. Food didn’t end up being the cause of or solution to my mother-of-all-eczema-episodes a few years back, but since then I look at food in a more health-focused way, and I see the nutritional wisdom behind many traditionally-prepared foods (true sourdough bread, yogurt, long-soaked beans).
Now I find myself giving yogurt away frequently to friends and family eager to try it. This summer, I gave jars of yogurt to two family members on strong antibiotics, to help them replenish beneficial bacteria in their systems. I hooked my neighbor, who was happy to find that my yogurt doesn’t irritate her throat the way store-bought yogurt does. And I gave both yogurt and starter to a friend who, upon sampling the yogurt, was near tears because it reminded her so much of her childhood in Germany.
So I decided that maybe the world could use one more recipe for homemade yogurt after all. I took these pictures three years ago but didn’t think enough people would want to make yogurt at home. Now I think the interest may be there.
Homemade yogurt is really easy to make – heat up milk, cool it to warm, add starter and wait. And the benefits are many:
Probiotics – Commercial yogurts are not fermented nearly long enough to have high levels of probiotic bacteria, but homemade yogurt is a live probiotic source you can count on. My great friend with gastroesophageal reflux, her husband with pancreatitis, plus his good friend with ulcerative colitis all swear by homemade yogurt as a major factor in their improved conditions. Gut health has gained focus in recent years as people realize that the food you eat only provides benefits if the body is digesting and absorbing nutrients, as well as eliminating toxins, as it should.
Easier to digest than milk – Long-fermented yogurt is near lactose free, making it an excellent source of calcium for the dairy-sensitive. Yogurt bacteria eat the lactose for us, and we eat the bacteria. Everyone wins.
Cheaper – A quart of organic milk makes a quart of organic yogurt. If organic milk costs $6 a gallon, a quart of homemade organic yogurt costs about $1.50 a quart (I’m not going to count the cost of yogurt starter, since it only takes a spoonful). Commercial organic yogurt costs maybe $4 a quart.
Purity – Homemade yogurt doesn’t have the additives that are packed into commercial yogurt, such as guar gum, carageenan, coloring, artificial flavoring or sweeteners. It’s just milk, but better.
Taste – Homemade yogurt is like the natural yogurts sold in Europe. Sweeten it, if you like, with honey, maple syrup or fruit preserves. A few hours in a strainer can make it into a thicker Greek yogurt. Having homemade yogurt on hand is also handy for pancakes and baking – it’s a great buttermilk or sour cream substitute – though of course the probiotic bacteria don’t survive cooking temperatures.
Like natural sourdough bread, a fresh batch of yogurt is fed by a yogurt starter. Use a spoonful of fresh, good-quality, live-bacteria plain yogurt. Just remember the yogurt you make can only be as good as your starter.
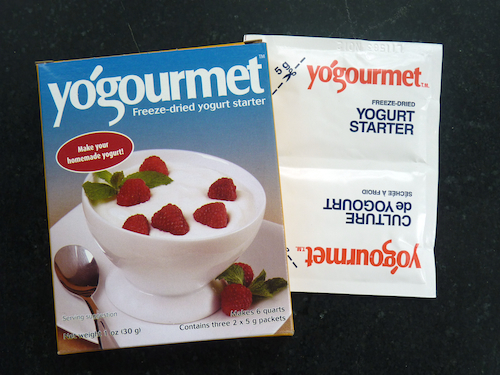
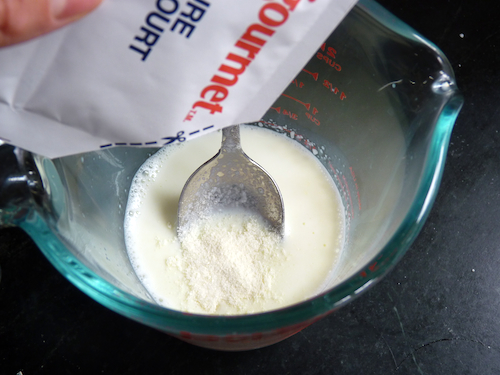
Or you can buy a powdered yogurt starter, like this one, which will store for ages in your fridge until you are ready to use it. Powdered starters generally give you more detail about which probiotics you are getting.
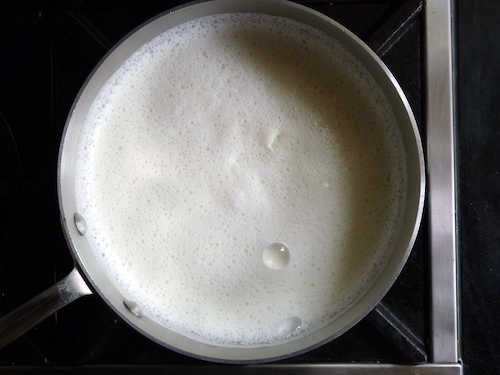
Heat a pot of milk until near boiling. The heat will eliminate any unwanted bacteria, but if you let it boil the yogurt texture may be a bit grainy. It’s all too easy for milk to boil over and leave a big mess, so I’ve learned to use a gentle heat.
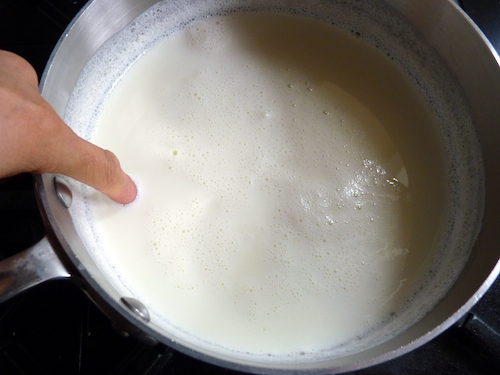
Let it cool until the milk is comfortably warm but no longer hot to touch.
Gently stir the starter into a ladleful of milk. You only need a spoonful of yogurt for every quart of milk. Or in this case, one packet of starter for a quart.
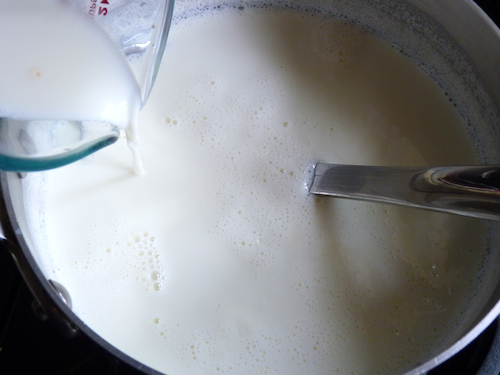
Pour the milk and starter back into the pot. Don’t stir.
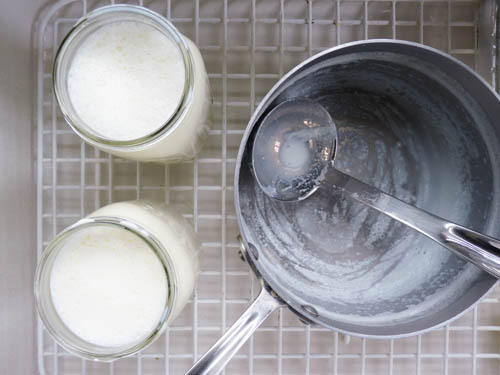
Fill clean, dry jars. Usually I use a ladle, but sometimes I live on the edge and pour from the pot. Because this part can get sloppy, I do it in the sink.
Now all there is to do is keep the yogurt warm and happy, about same temperature as it is now. No stirring, no jiggling – the bacteria just want to be left alone to do their thing.
There are plenty of ways to keep your yogurt warm:
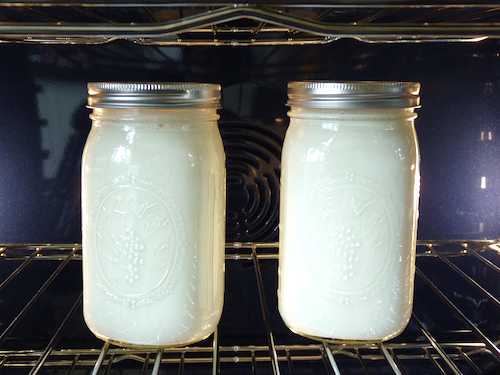
Oven – A pilot light or oven light can keep the oven warm enough, but it does tie up your oven for a number of hours.
Insulated cooler – You can put the yogurt in an insulated cooler, adding a jar of hot water from the tap for extra warmth if your cooler is particularly large.
Blankets – Some people wrap up their yogurt in towels or blankets for insulation. Or even the Russian doll method of a jar inside a towel inside a cooler.
Yogurt maker – You can buy an electric yogurt maker, which is basically a little incubator. But it’s just another small appliance to store.
I love my ovens in Ohio, because they have extra-low temperature settings. And with two ovens it’s not a problem to have one tied up for my little yogurt factory.
The longer you incubate the yogurt, the more time you give the bacteria to consume lactose and multiply. After about 24 hours, you’ve maximized the bacteria and minimized the lactose. It’s a little more tart than shorter-fermented yogurt (lactic acid is a byproduct of the lactose consumption), but nothing a bit of honey can’t solve.
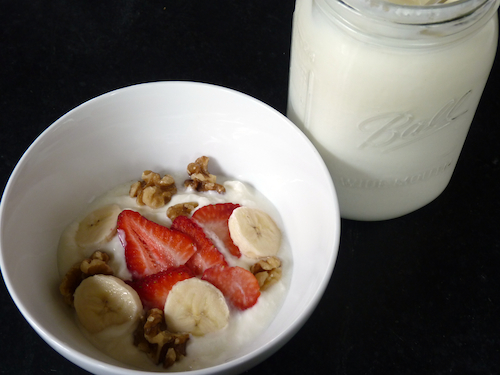
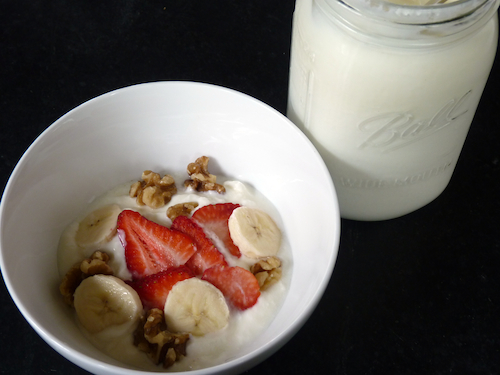
I’m so used to it now, even with my sweet tooth I like yogurt best with berries and no sweetener. When our German friends came a couple of summers ago, we went through at least a quart of yogurt every morning with strawberry preserves, and they felt right at home.
Labor Day recipes
I know, yogurt isn’t Labor Day fare…here are some ideas from the archives. Enjoy the long weekend!
- Greek grilled chicken [post] [printable]
- Lighter brighter caesar salad [post] [printable]
- Mom’s barbecue chicken [post] [printable]
- Orzo with zucchini, mint, lemon and feta [post] [printable]
- Penne with fresh tomato and zucchini [post] [printable]
- Quinoa arugula salad [post] [printable]
- Quinoa with roasted vegetables [post] [printable]
- Shrimp tacos with tomato and cilantro [post] [printable]
- Shrimp with tomato, lemon, feta and parsley [post] [printable]
- Broccoli salad with Greek yogurt, cranberries and almonds [post] [printable]
- California Greek salad [post] [printable]
- Chopped taco salad [post] [printable]
- Greek salad [post] [printable]
- Green beans with feta and balsamic vinegar [post] [printable]
- Kale, quinoa and apple salad [post] [printable]
- Kale salad with cranberries and toasted walnuts [post] [printable]
- Lemony potato and green bean salad [post] [printable]
Yogurt at Home
If you can heat milk, you can make yogurt. Stir in starter and keep it warm, and in a few hours you’ll have pure, additive-free, probiotic-packed yogurt. It’s wonderful for baking (an excellent buttermilk substitute), cooking, smoothies or eaten simply with berries and a drizzle of honey.
Ingredients (scale up as you like)
- 1 quart (4 cups) milk, whole or lowfat
- Yogurt starter (1 tablespoon plain yogurt with active bacteria or powdered yogurt starter)
Preparation
- Heat milk in a saucepan over medium heat. Heat until near boiling (milk will be very steamy, with some bubbling at edges), but don’t let it boil. Turn off heat and cool milk to about 115 degrees F, until your freshly-washed tester finger can stay in comfortably for 10 seconds. You can put the pot in a cold-water bath to speed the cooling process, but take the pot out early enough that you don’t risk overcooling the milk. Yogurt bacteria die at temperatures above 130 degrees F, and they don’t grow well below 98 degrees F. But a 30-degree window is a lot of leeway, so don’t stress – if it feels comfortably warm to your touch, you’re in the right range.
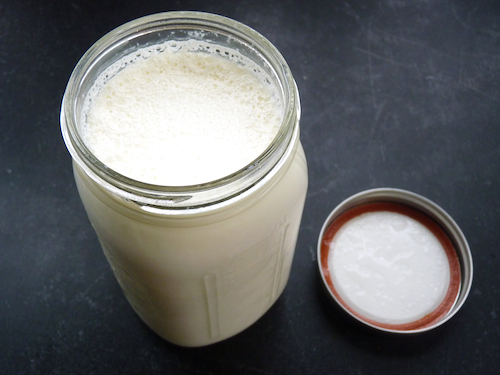
- Have a clean, dry jar and lid ready. I love a quart-sized mason jar, but you could also make your yogurt in the pot or divide it into smaller jars.
- Take your yogurt starter (powder in a packet or a spoonful of plain active yogurt) and mix gently with a ladleful of warm milk. Pour the mixture back into the pot (without stirring) and divide into jars, if using.
- Yogurt needs to be kept warm as it ferments – 100 to 110 degrees is ideal. You can keep it in an oven – an incandescent oven light bulb turned on, or a pilot light, should keep it warm enough (just don’t accidentally preheat your oven for cooking while the yogurt ferments). Another good method is to put jars of yogurt in an insulated cooler (add a jar of hot water from the tap if you need to give a little extra warmth to a large cooler). Some people even wrap jars of yogurt in blankets or towels for insulation.
- Yogurt can ferment for as little 3-4 hours or as long as 24 hours. The yogurt bacteria consume lactose as they multiply, and after 24 hours the yogurt has close to minimum lactose and maximum probiotic content. But a shorter fermentation will . If it still seems runny when you check on it, add a little more heat (just a few seconds of turning the oven on, or adding/replenishing a hot water bottle in the cooler) and go away for another few hours.
Notes
- Remember that your yogurt will only be as good as your starter, so make sure you use a high quality plain yogurt (eg Fage) or starter (eg Yogourmet).
- Cooling time for the milk depends on the size of your pot and the volume of milk. A quart might take 20 minutes; two quarts can take 45.
- A skin will form at the surface of your milk as it cools. I skim it off to allow steam to escape and discard it, but it doesn’t hurt to stir it in – it will just end up in the top of your finished yogurt.
- Some people add nonfat dry milk powder for extra thickness, particularly if they are using very low-fat milk. I prefer whole milk with no powder.
- Yogurt doesn’t like to be jiggled, so for a nice, creamy consistency, keep it still as it ferments.
- Save some untouched yogurt (you may want to spoon some out into a small jar) for starting your next batch. Though after several grandfathered batches, I generally restart with a fresh starter for better oomph.
- Don’t stir the finished yogurt unless you like a runnier texture.
- The bit of watery liquid on the top of the yogurt is just whey; eat it or pour it off as you like.
- For thicker Greek-style yogurt, you can strain your yogurt in a fine-mesh or chessecloth-lined strainer for several hours. The whey that drains out may be used as a nutritious liquid in breadmaking, smoothies, etc.
- A longer-fermented yogurt, with its low lactose content, is more digestible and packs a bigger probiotic punch.
- Yogurt keeps well for at least a couple weeks in the refrigerator. It will easily last past that, but its probiotic content may begin to decline.
- Yogurt can be frozen for longer storage, though the texture will be affected somewhat. You can also freeze small amounts of yogurt to keep as future starters.
Here’s the link to a printable version.



Thanks–Your post is great timing for me! I have been surfing the internet lately for how to make homemade yogurt. I eat a lot of yogurt but most store-bought (except for plain Fage Greek yogurt) seems too sweet for me so I’m excited to try your recipe–and will let you know if it works for me.
hi kat – i hope you love it! i think you will be surprised how easy it is.
In general: Love your blog, love your info, love your overall philosophy!
Today: Can you find yogurt starter in grocery stores? Not sure I’m ready to buy via Amazon/commit to 9 batches right off the bat.
Do you use whole milk or less fat? (I’m okay with milk fat, just wondering what your experience was)
Can I assume that after the 24 hour incubation, you store the yogurt in the fridge? Also, thoughts on pouring mixture into smaller containers? How long does a batch keep? (It will probably be just me, and an occasional visitor enjoying it. Hubby not a yogurt fan, but this might change his mind!)
Thanks in advance for any info you can provide!
hi barbara – you are kind – thank you!
health food stores should carry freeze-dried yogurt starter, but you can also just use good-quality plain yogurt to start. just make sure it says active cultures, or live bacteria, etc.
yes, store the yogurt in the refrigerator after incubation – i’ll make sure that’s clear in the recipe! you can either incubate the yogurt in the pot, then divide into smaller containers after, or you can divide it first and incubate in the smaller containers.
a batch will keep well for at least 2-3 weeks in the fridge, especially if you keep it uncontaminated (use a fresh spoon when you scoop out the yogurt to prevent introducing new bacteria to the container). from what i’ve read, the bacteria may start to decline in number after a couple weeks of storage – the yogurt is most active when fresh.
my DH also has never been a yogurt fan, but he’s starting to come around. his latest effort was maple syrup and blueberries, and he really enjoyed it. so maybe your husband will join the yogurt party. =)
Love that you posted this. I’ve been wanting to make yogurt for my own breakfasts for a long time and I think this is a sign that I must.
Just wondering, if I use a cooler to ferment, do I need to replace the hot water if I want the 24 hour fermentation? I assume so, but any thoughts on how frequently? Thanks!
hi emma – really depends on how well insulated your cooler is, and how much yogurt you are making (eg several jars in a small cooler will stay warmer than one jar in a large cooler). probably a good idea to replenish your hot-water bottle after a few hours. don’t worry too much, you have leeway on temperature – if it gets lukewarm, the bacteria won’t die, they’ll just be less active. once you warm them up, they’ll be back in action. good luck, and ping me if you have any trouble!
Thanks! I have a half gallon of milk, plus two jars with water in a medium cooler. I’m so excited, I’m pregnant and can’t get enough yogurt! Perfect timing!
Which is best to use for the health benefits? Starter or plain yogurt? This looks so interesting i want to try it.
hi betty – it works either way, but using a fresh starter ensures the bacterial content. hard to know with existing yogurt how much live bacteria is in it. my friends who make their own yogurt to help with GI issues always use a fresh starter with each batch because it made a noticeable difference for them. if i am making yogurt regularly, i might set aside a bit for starter, knowing it’ll be fresh, and then go a few batches before starting again with the powdered starter. hope that helps!
Yes thank you